A WordPress plugin is a third-party software that adds new functionality to WordPress (for details, refer to https://wordpress.org/plugins/). WordPress Toolkit allows you to install plugins on one or more WordPress installations.
Installing and Removing Plugins
To install a plugin on one or more WordPress installations, go to Websites & Domains > WordPress > Plugins tab and click Install.
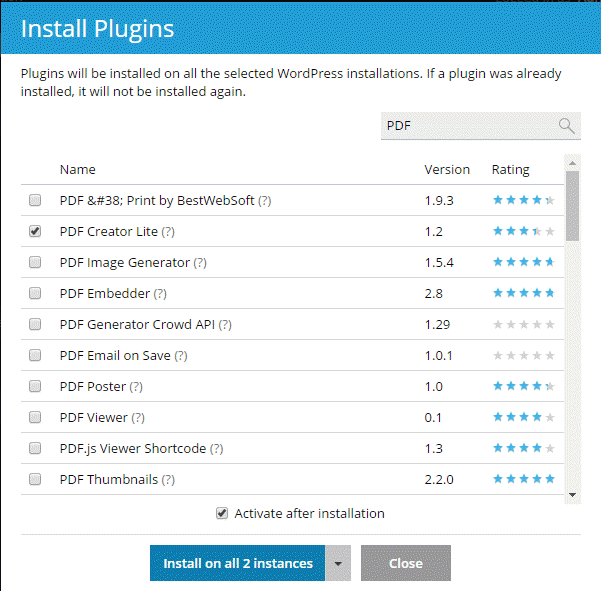
Type in the name of the plugin you want to install and click to search. Once the search is complete, locate the desired plugin in the list and select the corresponding checkbox. You can install the plugin on all WordPress installations on the currently selected subscription or select one or more installations on which the plugin will be installed. The selected plugin will be installed on all the selected WordPress installations. By default, newly installed plugins are activated immediately; you can prevent this by clearing the Activate after installationcheckbox.
If you search for a plugin, select the checkbox, and then perform a new search without installing the plugin first, the results of the first search will be lost. For that reason we recommend that you install plugins one at a time.
To remove a plugin from one or more WordPress installations, go to Websites & Domains > WordPress. Select the checkboxes next to the names of WordPress installations from which you want to remove a plugin and click Plugins. Click theicon next to a plugin to remove it from the selected WordPress instances.
You can also remove one or more plugins from all WordPress installations on a subscription. To do so, go to Websites & Domains > WordPress > Plugins tab, select the checkboxes next to the names of the plugins you want to remove, and click Uninstall.